
Qualys
This page will guide you through the setup of integrating Qualys as a finding source
Prerequisites
In order to configure Qualys as a findings source you'll require the Qualys API URL which is based on your region. you can find the correct API URL in the Qualys management interface based on this information from Qualys
in addition you'll need a user with with sufficient permissions to access Qualys APIs, to do so follow the instructions below:
- Create User
- Log into your Qualys console; under the Vulnerability Management module, click the “Users” tab.
In the top right of the User table - Click New -> User.
Fill in the first name and last name with values like: “API”, “User”. And attach it to a valid email address within your organization; this can be an alias or service account but will be needed for activation.
- Log into your Qualys console; under the Vulnerability Management module, click the “Users” tab.
- Assign Permissions
- For User Role, use the following values:
- Reader
- GUI and API access; GUI is needed for activation
- Business unit - Assign a relevant BU for the data you would like the integration to be able to read. In many cases, it can be “Unassigned.”
- For Asset Groups:
- assign all relevant groups for the integration to be able to read. In many cases, it should be “All.”
- For Permissions: “Manage VM module” should be checked.
- No notifications are needed; all can be turned off.
- Symantec 2FA should be disabled.
- For User Role, use the following values:
- Activate the account
- Once the user is created, you will receive an email with a link to activate the account. Click the link, and a password will be provided for the new user.
- Log in to the Qualys console with the new user to finish the activation process.
Configuring the integration within Opus
Now that you have all the relevant information, login to Opus --> Integrations --> finding sources and find Qualys;
click add connection and fill in the information as seen below, then click "verify connectivity" and enable polling, then set the polling interval. to the desired time in hours.
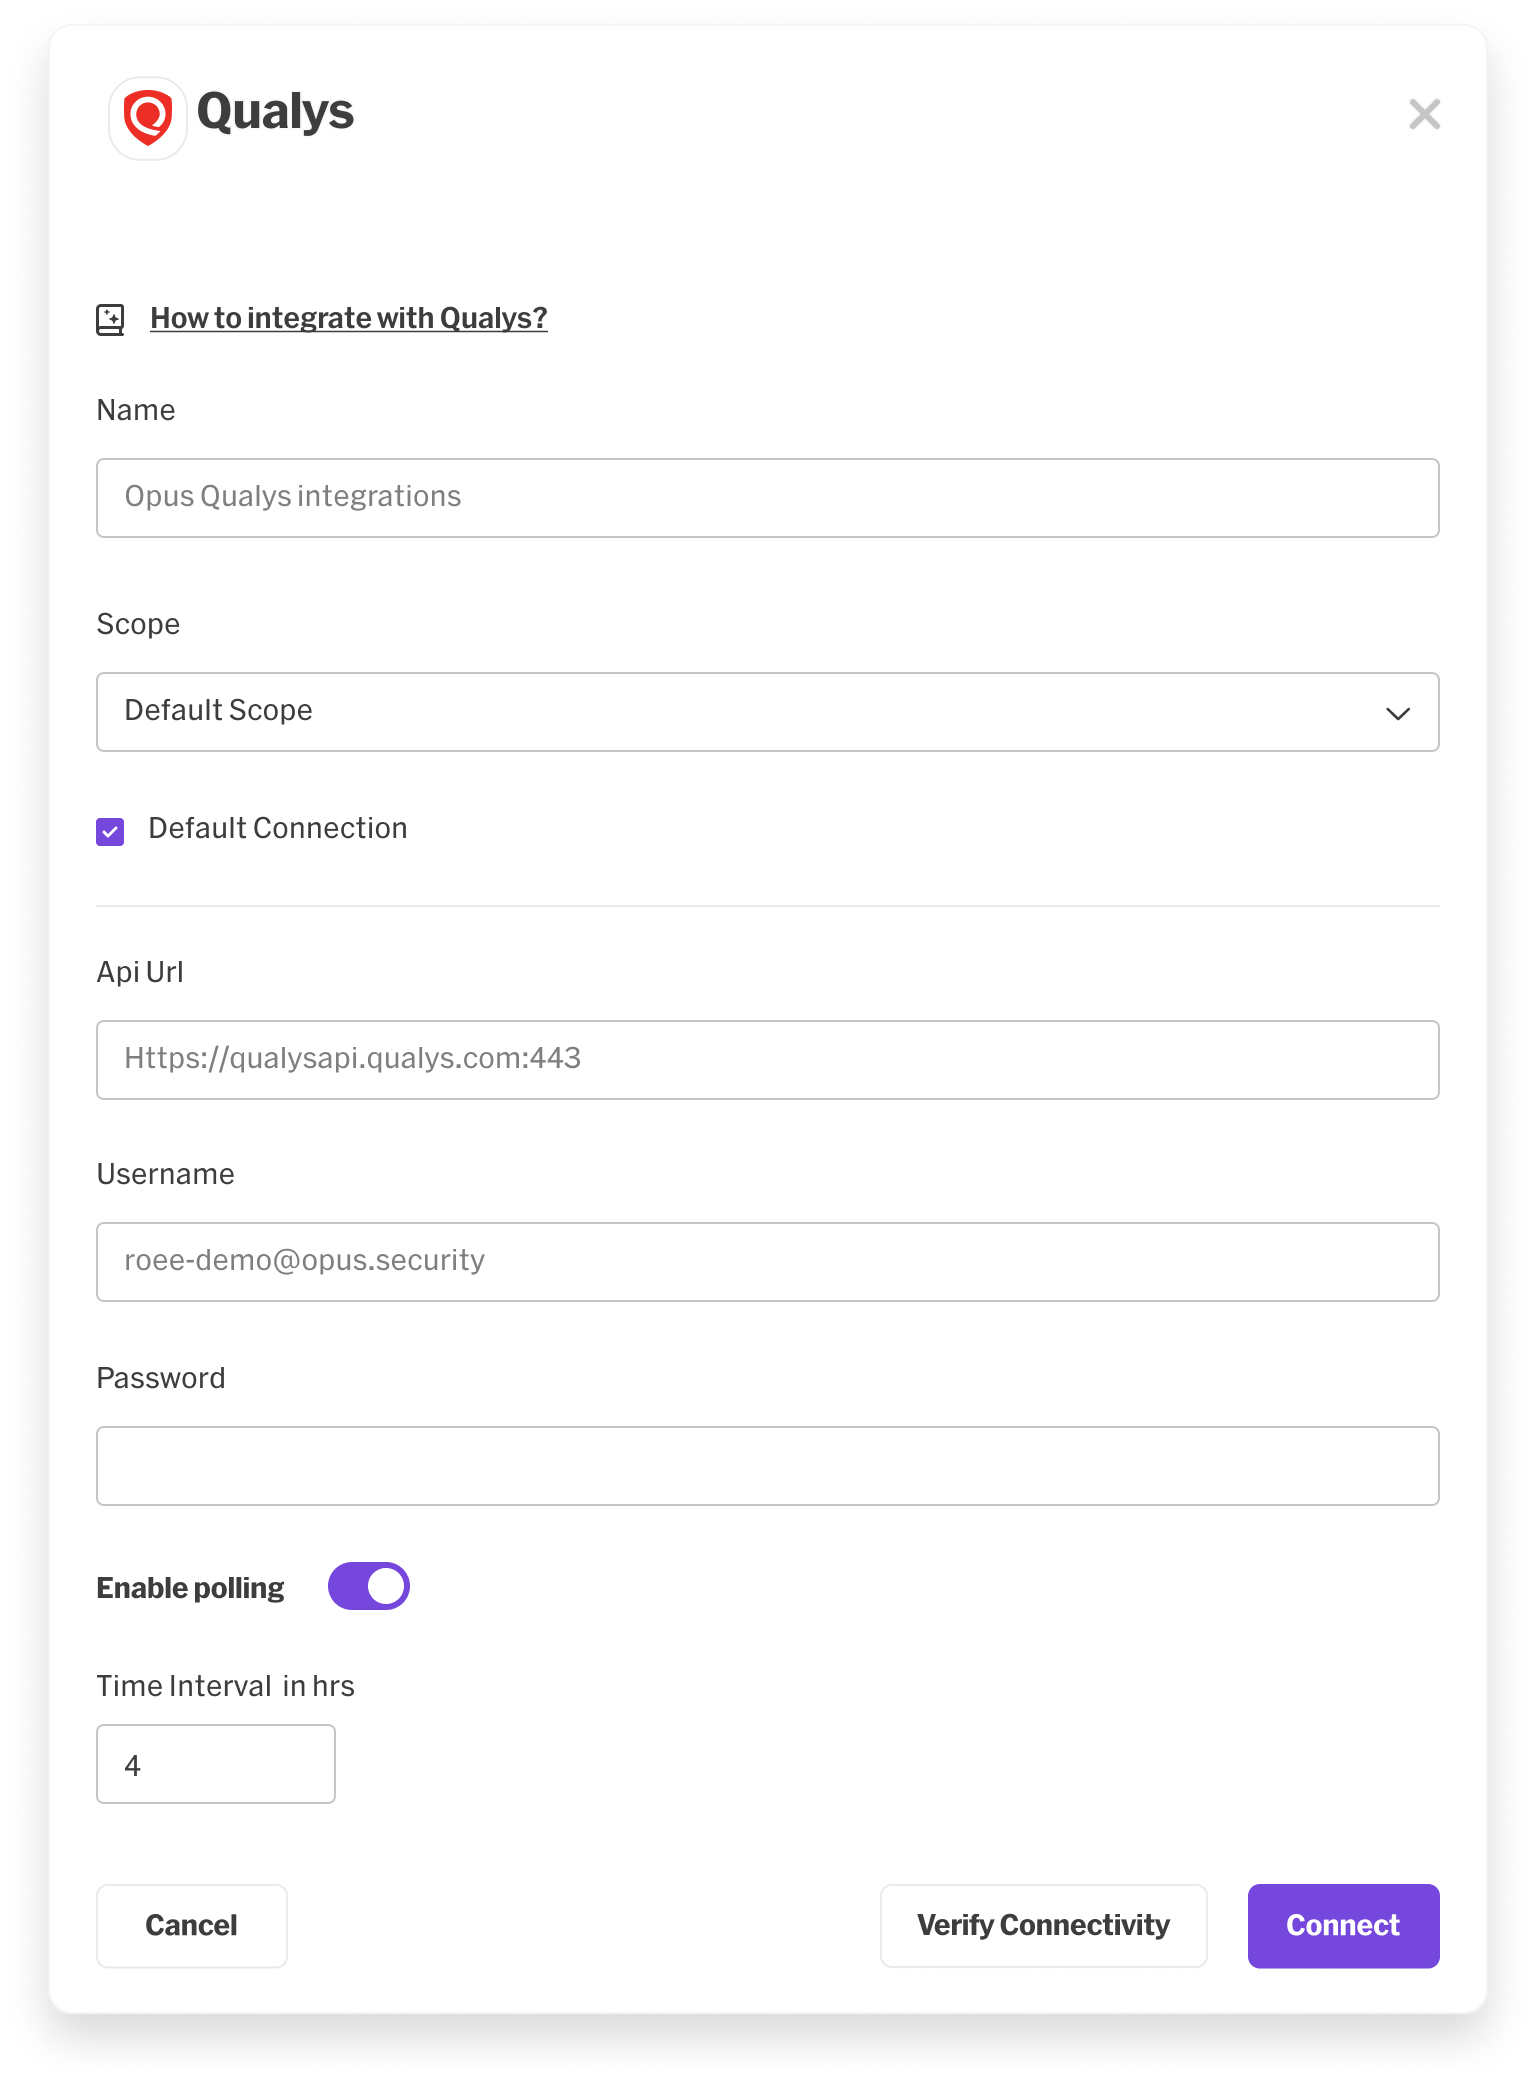
click "Connect" and you're done!
Updated 5 days ago